How do I create roles and set permissions for my users?
Company admins have the ability to give and take away access to key Toolweb features.
You must be logged in as a company admin to create roles and set permissions.
Click on My Account in the top right of the screen to access your account area.
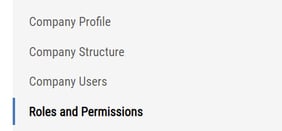
Click on Roles and Permissions in the left sidebar of the account screen.

Editing and Creating Roles
On this screen, you'll see a list of your current roles. If you haven't created any custom roles, you'll likely just see Default User and Manager Users. You can edit one of these roles by clicking on the Edit link next to them, or you can create a new role by clicking the Add New Role button under the list of roles.

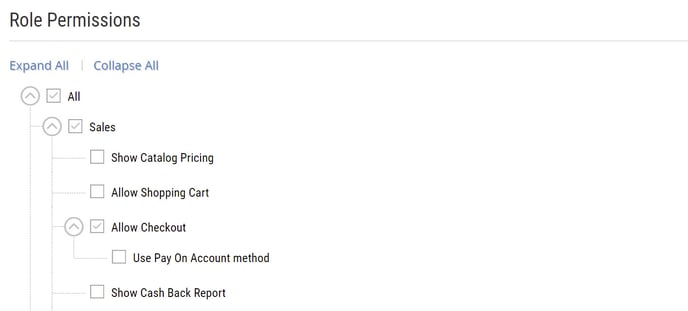
Once you choose one of those options, you'll see a list of permissions for your users. Simply check the permissions you want your users to have, and uncheck the ones you don't want them to have access to. For instance, unchecking "Show Catalog Pricing" will keep your users from seeing pricing on Toolweb, unchecking "Allow Shopping Cart" keeps users from adding items to their cart and placing orders, and so on. You can hide promotional trackers, such as Holiday Shopping Spree or Virtual Expo cashback by unchecking "Show Cash Back Report", and you can restrict users from seeing order history (including invoices) by unchecking "View Order History Data".

If you choose to create a new role, all check boxes will default to unchecked. We recommend creating a new role by clicking on the Duplicate link to the right of the role closest to the one you are creating.

Setting a User's Role
To set a current user's role, click on Company Users in the left sidebar of the Account area.
Find the user you'd like to edit in the list of users and click the Edit link in that row.

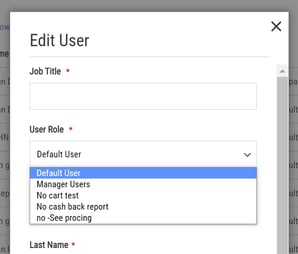
Click on the User Role field in the pop-up and select the applicable role from the drop-down list. Then click Save to save your changes.

You'll have access to the same field to assign roles when creating new users.
![Toolweb Logo 2022 Full Color.png]](https://help.toolweb.com/hs-fs/hubfs/Print_Media_IMAGES/Logos/Toolweb%20Logo%202022%20Full%20Color.png?width=180&height=56&name=Toolweb%20Logo%202022%20Full%20Color.png)